Category:World War I Photographs by Frank Hurley
Jump to navigation
Jump to search
Subcategories
This category has only the following subcategory.
Media in category "World War I Photographs by Frank Hurley"
The following 87 files are in this category, out of 87 total.
-

-

-

-
 1st Aust Siege Bty (AWM E02048).jpg 450 × 290; 52 KB
-

-
 1stAustralianDivisionHooge5October1917.jpeg 800 × 627; 41 KB
-
 54 Battery Australian Siege Artillery in action (2867557774).jpg 640 × 511; 92 KB
-
 5thAustralianFieldAmbulanceBroodseinde4Oct1917.jpeg 450 × 321; 37 KB
-
 9.2inchHowitzerOverhaulSteenvoordeOctober1917.jpeg 450 × 337; 54 KB
-
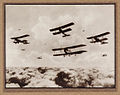 A flight of bombing planes.jpg 1,400 × 1,111; 310 KB
-
 AIF8inchHowitzerBatteryBirrCrossRoads26September1917.jpeg 640 × 455; 185 KB
-
 ALHBSoldierFlowers.jpg 600 × 418; 48 KB
-
 An Australian Light Horseman.jpg 792 × 1,050; 253 KB
-
 Anzac Cove and New Zealand Point, looking north, 1915.jpg 1,017 × 729; 500 KB
-
 ANZAC Mounted Div (B01518).jpg 640 × 476; 242 KB
-
-
 Australian 1st Light Horse Regiment AWM Photo B01468.jpg 450 × 324; 29 KB
-
 Australian infantry small box respirators Ypres 1917.jpg 1,200 × 1,607; 591 KB
-

-
 Australian soldiers September 1917.JPG 3,600 × 2,653; 1.17 MB
-
 Australian4.5inchHowitzerHannebeek4October1917.jpeg 450 × 333; 75 KB
-
 Australian8inchHowitzerFiringYpres15September1917.jpeg 450 × 339; 26 KB
-
 AWM B01445 Deiran Railhead.jpeg 450 × 334; 28 KB
-
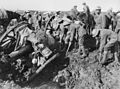
 Battle of Menin Road - wounded at side of the road.jpg 1,264 × 964; 974 KB
-
 6inch26cwtHowitzerGirdlesYpresOctober1917.jpeg 450 × 336; 43 KB
-
 CamouflagedAustralian9.2inchHowitzerYpres1917.jpeg 450 × 340; 69 KB
-
 Chateau Wood near Ypres (2866720075).jpg 640 × 512; 91 KB
-
 Chateau Wood Ypres 1917.jpg 1,600 × 1,227; 359 KB
-
 Chateauwood.jpg 1,600 × 1,227; 376 KB
-

-
 Desert Mounted Corps HQ Staff at Slutzkin house - Rehovot.jpg 1,000 × 756; 219 KB
-
 Desert Mounted Corps HQ Staff.jpg 475 × 654; 212 KB
-
 Episode after Battle of Zonnebeke 1918 Hurley.jpg 2,730 × 1,864; 428 KB
-
 Frank Hurley component image -- explosion 001.jpg 1,495 × 1,760; 1.33 MB
-
 Frank Hurley component image -- explosion 002.jpg 1,455 × 1,023; 1.21 MB
-
 Frank Hurley component image -- fallen comrades 001.jpg 1,499 × 1,064; 1.05 MB
-
 Frank Hurley component image -- fallen comrades 002.jpg 1,472 × 1,016; 998 KB
-
 Frank Hurley component image -- horses on horizon 001.jpg 1,505 × 1,023; 1.13 MB
-
 Frank Hurley component image -- horses on horizon 002.jpg 1,515 × 1,071; 1,004 KB
-
 Frank Hurley component image -- the raid (over the top) 001.jpg 1,909 × 1,455; 1.72 MB
-
 Frank Hurley component image -- the raid (over the top) 002.jpg 1,895 × 1,462; 1.24 MB
-
 Frank Hurley composite image -- explosion.jpg 1,495 × 1,974; 1.97 MB
-
 Frank Hurley composite image -- fallen comrades.jpg 1,524 × 1,809; 1.19 MB
-
 Frank Hurley composite image -- horses on horizon.jpg 1,552 × 1,092; 1.17 MB
-
 Frank Hurley composite image -- the raid (over the top).jpg 2,368 × 1,606; 1.56 MB
-
 Frank Hurley composite image and its components -- explosion.tif 2,338 × 1,653; 14.75 MB
-
 Frank Hurley composite image and its components -- fallen comrades.tif 2,338 × 1,653; 14.75 MB
-
 Frank Hurley composite image and its components -- horses on horizon.tif 2,338 × 1,653; 14.75 MB
-
 Frank Hurley composite image and its components -- the raid (over the top).tif 2,317 × 1,612; 14.25 MB
-
 FrankHurleyAustralian8inchHowitzerBattery.jpg 650 × 496; 63 KB
-
 FrankHurleyAustralian8inchHowitzerShells.jpg 650 × 496; 61 KB
-
 FrankHurleyAustralian9.2inchHowitzerFiring.jpg 640 × 514; 98 KB
-
 FrankHurleyAustralian9.2inchHowitzerFiring1917.jpg 4,429 × 3,419; 3.86 MB
-
 FrankHurleyAustralian9.2inchHowitzerGunnersInGasMasks.jpg 650 × 498; 65 KB
-
 FrankHurleyCamouflagedAustralian18pounder.jpg 650 × 498; 62 KB
-
 FrankHurleyUnloading15InchHowitzerShells.jpg 650 × 488; 63 KB
-
 Gas attack. Funk holes in the trenches (2866682017).jpg 640 × 514; 92 KB
-
 Gasmasked artillerymen.jpg 858 × 599; 74 KB
-
 HACBelah.jpg 450 × 320; 69 KB
-
 1stSquadronAustralianFlyingCorps.jpg 2,953 × 2,085; 651 KB
-

-
 In the trenches (2867562462).jpg 640 × 513; 101 KB
-
 IncendiaryBombsRE8.jpg 2,953 × 2,228; 904 KB
-

-
 Interior of a dugout.jpg 700 × 481; 68 KB
-
 John Hines - AIF Souvenir King 1917.jpg 629 × 483; 181 KB
-
 Knocked out of action. Shell-torn ground (2866678577).jpg 640 × 530; 109 KB
-
 Lewis gun world war I.jpg 1,096 × 834; 248 KB
-
 Morning a Passchendaele. Frank Hurley (glass negative).jpg 419 × 549; 44 KB
-
 Morning a Passchendaele. Frank Hurley.jpg 5,887 × 6,500; 3.42 MB
-
 No 1 Squadron AFC Mejdel 1918.jpg 638 × 450; 186 KB
-
 Observer, pilot, and Bristol Fighter F2B aircraft.jpg 2,953 × 1,856; 629 KB
-
 P03631.042Williams.jpg 422 × 277; 49 KB
-
 PilotObserverBristolAircraft.jpg 2,124 × 2,953; 1,017 KB
-
 Registering up a battery of Australian "Heavies" (2867573478).jpg 640 × 515; 81 KB
-
 RMAGunnersAnd15inchHowitzerShellYpresOctober1917.jpeg 450 × 300; 61 KB
-
 Road on the battlefield, Westhoek (2866732543).jpg 640 × 517; 82 KB
-
 Ross Smith Bristol Fighter.jpg 1,200 × 800; 195 KB
-
 Surrounded by invisible death (2866724033).jpg 5,144 × 3,870; 10.83 MB
-
 The Battle of the Menin Road (2866714645).jpg 640 × 513; 81 KB
-
 The Front Line (2867541502).jpg 434 × 568; 93 KB
-

-
 The shell shattered areas of Chateau Wood (2867575696).jpg 640 × 518; 78 KB
-
 Unloading 15 inch Howitzer shells (2866739785).jpg 640 × 512; 74 KB
-
 Windy outpost on Westhoek Ridge (2867539080).jpg 640 × 517; 98 KB
-
 World War I soldiers in dugout.JPG 3,600 × 2,661; 1.16 MB
-
 Allied observation balloon Ypres 1917 AWM E01173.jpg 2,953 × 2,212; 866 KB
.jpg)
.jpg)

.jpg)


.jpg)


.jpg)
.jpg)


.jpg)


.jpg)


_001.jpg)
_002.jpg)


.jpg)


.jpg)


.jpg)

.jpg)


.jpg)

.jpg)


.jpg)

.jpg)

.jpg)
.jpg)
.jpg)
.jpg)
.jpg)
.jpg)
.jpg)

