User:PumpkinSky/Uploads/2017
2017 misc[edit]


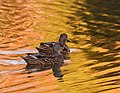
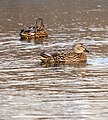
Mallard ducks[edit]
_mixed_pair_1.JPG)
_mixed_pair_2.JPG)
_mixed_pair_3.jpg)


_males-Three_stages_of_feeding_under_water.jpg)
_males-Synchronized_feeding_under_water.jpg)
_female_with_7_babies.jpg)
_pair_of_ducklings.jpg)
_duckling_swimming.jpg)
_male_swimming_1.jpg)
_female_swimming_1.jpg)
_female_swimming_2.jpg)
_male_swimming_2_LR.jpg)
_male_swimming_3_LR.jpg)
Pyrus pyrifolia Raja cultivar[edit]
_blossom5.jpg)
_blossom6.jpg)
_blossom7.jpg)
_blossom7crop.jpg)
_blossom8.jpg)
_blossom9.jpg)
_inflorescence-fruit_buds.jpg)
Pyrus pyrifolia Shinko cultivar[edit]
_inflorescence.jpg)
_pollinated_by_Apis_mellifera.jpg)
_inflorescence_2.jpg)
_inflorescence_3.jpg)
_inflorescence-fruit_buds.JPG)
_inflorescence1.JPG)
_inflorescence2.JPG)
_inflorescence3.JPG)
_inflorescence4.JPG)
_inflorescence5.JPG)
_inflorescence6.JPG)
_inflorescence7.jpg)
(from Commons:Photography critiques...)
Shinko cultivar photos[edit]
I have 12 photos of this here: User:PumpkinSky/Uploads/2017 in the Shinko section. Some aren't worthy of VI or QI nomination. But I think some are worhty of VI or maybe even QI nomination, but I'm not sure which one is best. Any advice appreciated. PumpkinSky talk 18:41, 30 March 2017 (UTC)
- Hi @PumpkinSky: I'd say the first 5 taken with the mobile phone would probably be rejected at QI (but not necessarily at VI), as they show some strange artefacts when viewed at 100% magnification. Looking at the remaining ones, some are over-all unsharp (e.g. File:Pyrus pyrifolia (Shinko) inflorescence4.JPG), require more depth of field (e.g. File:Pyrus pyrifolia (Shinko) inflorescence-fruit buds.JPG) or are not focused on the main subject (e.g. File:Pyrus_pyrifolia_(Shinko)_inflorescence3.JPG). But File:Pyrus pyrifolia (Shinko) inflorescence2.JPG is pretty good imho, as most of the front flower is in focus. I don't know how good your chances are at QI, but I think this one might be worth a try. For VI I would probably go for File:Pyrus pyrifolia (Shinko) inflorescence 3.jpg, as it shows the pink/purple parts of the flower nicely (unless it's not typical for the species/cultivar to have so many of them).
- Looking at your settings with the DSLR: As a general rule of thumb, for close-ups like this you usually want to stop down your aperture to at least F8, possibly more, as 1) this brings you more depth of field (= more of the subject will be sharp) and 2) over-all lens performance usually increases if stopped down an f-stop or two, so something around F8-F11 may well be close to the sharpness sweet-spot of your lenses (that's something you have to try out yourself; you can try to stop down even further, but at some point diffraction will become an issue, compare sample images at de:Beugungsunschärfe#Bildbeispiele). Hope that helps a bit, --El Grafo (talk) 14:36, 31 March 2017 (UTC)
- @El Grafo: Thank you so much!! This is the exact sort of detailed feedback I was looking for. I have another lens arriving tomorrow and will test that one out. Thanks again. @Ikan Kekek: Pinging you just as FYI. Thank you both, you've both been very kind. PumpkinSky talk 18:35, 31 March 2017 (UTC)
- @El Grafo: After reading your comments and looking over the photos, I understand much better what to do and look for. I agree, File:Pyrus pyrifolia (Shinko) inflorescence2.JPG is the best and I'm now going to put it up for VI. PumpkinSky talk 21:03, 31 March 2017 (UTC)
- @El Grafo: and @Ikan Kekek: Peulle promoted it to QI !!! Thanks guys! I'm also copying this thread to my Shinko section I linked to above to use as a reference tool. PumpkinSky talk 21:38, 31 March 2017 (UTC)
- @El Grafo: After reading your comments and looking over the photos, I understand much better what to do and look for. I agree, File:Pyrus pyrifolia (Shinko) inflorescence2.JPG is the best and I'm now going to put it up for VI. PumpkinSky talk 21:03, 31 March 2017 (UTC)
- @El Grafo: Thank you so much!! This is the exact sort of detailed feedback I was looking for. I have another lens arriving tomorrow and will test that one out. Thanks again. @Ikan Kekek: Pinging you just as FYI. Thank you both, you've both been very kind. PumpkinSky talk 18:35, 31 March 2017 (UTC)
Image voting[edit]
Hi. I've had to vote no on a number of your submissions, but please accept there is nothing personal in my voting. I've commented on shutter speeds, as you need 1/1000 minimum to freeze motion. Also, on you blueberry blossom, with the set up you used, you would only get 1.3mm depth of field taking the picture 20cm away from the flower and 7mm 40cm away: not enough. The main problem is the 85mm. You need 50mm max for this type of shot. Sorry to be bossy, but I don't want to keep rejecting your images. Charles (talk) 19:29, 1 April 2017 (UTC)
- Charles OK. Then why are so many macro lenses in the 80-105mm range? For my Nikon D5300 I have 3 lenses: 18-55mm, 70-300mm, and the 85mm macro lens. I'd noticed closer is not always better and I'm not yet sure which lens to use when. I'm currently trying to get better at macro photos. Thank you. PumpkinSky talk 19:37, 1 April 2017 (UTC)
- A good selection of lenses, but the macro is for close ups where you don't need DoF. Mine is 100mm and I use it for insects. Lots for you to read about online! See also this discussion Charles (talk) 20:56, 1 April 2017 (UTC)
- Charles Good to know. PumpkinSky talk 21:23, 1 April 2017 (UTC)
- A good selection of lenses, but the macro is for close ups where you don't need DoF. Mine is 100mm and I use it for insects. Lots for you to read about online! See also this discussion Charles (talk) 20:56, 1 April 2017 (UTC)
- Hi PumpkinSky, sorry for the late response, I'm pretty busy IRL right now. In repsonse to your question, it's difficult to give a simple answer here. As you may have noticed already, macro is one of the more tricky parts of photography. There are several factors involved that influence each other, and much of the process involves finding the right balance between those. For example, moving a bit further away from your subject may bring you better depth of field (DOF), but then you may not be able to fill the whole frame with your subject – so you crop/cut away some of the uninteresting parts at the borders and effectively pay for DOF by sacrificing megapixels. At the same subject distance, a shorter focal length will give you more DOF than a longer lens. But at the same time, with a longer focal length you can get the same magnification from further away, and being further away will give you more DOF as well. There is a lot of information about this out there (e.g. [1], [2], [3]). Some of this my be confusing, and sometimes information from different authors may seem to contradict each other (but usually that's just because they look at things from different angles). Nevertheless, it's a good idea to read a lot about this – but at some point you'll need to go out with your camera and get he real-life experience.
- My recommendation for that would be to do this like a controlled experiment. Start with the macro lens, pick a subject that doesn't move and has about the same size of your typical macro subject (pick something you can re-use later with the other lenses). If possible, put your camera on a tripod and then start varying one factor at a time: Choose one subject distance and take a series of pictures from F4 (or whatever your minimum F-number is) to F32 (or whatever the maximum is) – full stop increments should be enough, though, I wouldn't bother with half or third stops. Do the same with different camera-subject distances. Possibly repeat with smaller/larger subjects. Observe how DOF will increase steadily with larger F-values, but over-all sharpness will be best at medium apertures, etc. Use this to get a rough idea on how the different factors interplay with each other, then shoot a bunch of real-life subjects to get some training. Examine your results closely (use software that will show you embedded metadata like aperture value of each image – lots of free software available, recommendations would depend on your OS). Once you've got a feeling for the whole system, you may want to try how your zoom lenses compare to that at different focal lengths, so repeat your experiments with them. Or take a totally different approach, but I really recommend a combination of strategic, laboratory style testing and real-life experience.
- Why do I recommend to start with the macro lens? Well, for once, it has a fixed focal length. There are so many factors involved that it makes sense to at least not worry about focal length in the beginning. It's also very likely that, all things considered, the macro prime lens will give you the best over-all performance in most cases. They are also usually built for good manual focus operation, which can be very handy for macro photography.
- As a final note: This is all very technical stuff, simply because in macro photography the chances of getting away with a quick snapshot are much slimmer than in other areas. Technique is important, but try to not obsess too much about the technical aspects and leave some room for fun and creativity as well ;-) --El Grafo (talk) 10:01, 7 April 2017 (UTC)
Very interesting. I will work at it. Thank you. PumpkinSky talk 11:00, 8 April 2017 (UTC)
Pyrus pyrifolia Shinko cultivar - part 2[edit]
_pollinated_by_Apis_mellifera_1.jpg)
_pollinated_by_Apis_mellifera_1crop.jpg)
_pollinated_by_Apis_mellifera_2.jpg)
_pollinated_by_Apis_mellifera_3.jpg)
_pollinated_by_Apis_mellifera_4.jpg)
_pollinated_by_Apis_mellifera_5.jpg)
_pollinated_by_Apis_mellifera_6.jpg)
_pollinated_by_Apis_mellifera_7.jpg)
_pollinated_by_Apis_mellifera_8.jpg)
_pollinated_by_Apis_mellifera_9.jpg)
_pollinated_by_Apis_mellifera_10.jpg)
_pollinated_by_Apis_mellifera_11.jpg)
_pollinated_by_Apis_mellifera_12.jpg)
_pollinated_by_Apis_mellifera_13.jpg)
_pollinated_by_Apis_mellifera_14.jpg)
_pollinated_by_Apis_mellifera_15.jpg)
_pollinated_by_Apis_mellifera_16.jpg)
_inflorescence8.JPG)
_inflorescence9.JPG)
_inflorescence10.JPG)
_inflorescence11.jpg)
Studies in water droplets[edit]


Thailand[edit]
08 April[edit]


09 April[edit]


10 April[edit]


11 April[edit]


12 April[edit]


13 April[edit]


14 April[edit]


15 April[edit]


16 April[edit]


17 April[edit]


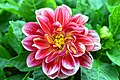
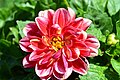
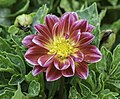
Dahlietta Alexia[edit]
-

-

-
-

-

-
-

-

-
 2.5 months later


Coreopsis tinctoria cultivar Uptick Cream and Red[edit]


Point shooting practice[edit]
Pyrus pyrifolia Raja cultivar[edit]
These were all with my 18-55mm lens on "A" mode.
_young_fruit_1.jpg)
_young_fruit_2.jpg)
_young_fruit_3.jpg)
_young_fruit_4.jpg)
_young_fruit_5.jpg)
_young_fruit_6.jpg)
_young_fruit_7.jpg)
_young_fruit_8.jpg)
_young_fruit_9.jpg)
_young_fruit_10.jpg)
_young_fruit_11.jpg)
_young_fruit_12.jpg)
_young_fruit_13.jpg)
_young_fruit_14.jpg)
_young_fruit_15.jpg)
_young_fruit_16.jpg)
_young_fruit_17.jpg)
These were all with my 85mm macro lens on "A" mode.
_young_fruit_18.jpg)
_young_fruit_19.jpg)
_young_fruit_20.jpg)
_young_fruit_21.jpg)
_young_fruit_22.jpg)
_young_fruit_23.jpg)
_young_fruit_24.jpg)
_young_fruit_25.jpg)
_young_fruit_26.jpg)
NEXT DAY Pyrus pyrifolia Raja cultivar[edit]
These were all with my 85mm macro lens on "A" mode.
-

-

-

-

-

-

-

-

-

-

-

-

-

-

-

-

-

-

-
 six weeks later
 -
 six weeks later
 -
-
 August
 -

_young_fruit_27.jpg)
_young_fruit_28.jpg)
_young_fruit_29.jpg)
_young_fruit_30.jpg)
_young_fruit_31.jpg)
_young_fruit_32.jpg)
_young_fruit_33.jpg)
_young_fruit_34.jpg)
_young_fruit_35.jpg)
_young_fruit_36.jpg)
_young_fruit_37.jpg)
_young_fruit_38.jpg)
_young_fruit_39.jpg)
_young_fruit_40.jpg)
_young_fruit_41.jpg)
_young_fruit_42.jpg)
_young_fruit_43.jpg)
_young_fruit_44.jpg)
_fruit_1_LR.jpg)
_fruit_2_LR.jpg)


NEXT DAY Persimmon young fruit[edit]
These were all with my 85mm macro lens on "A" mode.


Tree bark shooting practice - motion, EV fix, timer, and burst studies[edit]
Prunus cerasus Montmorency cultivar tree bark[edit]
These were all with my 85mm macro lens on "A" mode.


Prunus cerasus tree bark ROUND 2[edit]
These were all with my 85mm macro lens on "A" mode.


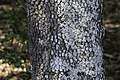
Pyrus pyrifolia tree bark ROUND 2[edit]
These were all with my 85mm macro lens on "A" mode.
_tree_bark_1.jpg)
_tree_bark_2.jpg)
_tree_bark_1.jpg)
_tree_bark_2.jpg)
Prunus cerasus tree bark ROUND 3[edit]
These were all with my 85mm macro lens on "A" mode.


Pyrus pyrifolia tree bark ROUND 3[edit]
These were all with my 85mm macro lens on "A" mode.
_tree_bark_3.jpg)
_tree_bark_4.jpg)
Prunus cerasus tree bark ROUND 4[edit]
These were all with my 18-55mm macro lens on "A" mode, set at 55mm.


Pyrus pyrifolia tree bark ROUND 4[edit]
These were all with my 18-55mm macro lens on "A" mode, set at 55mm.
_tree_bark_5.jpg)
_tree_bark_7.jpg)
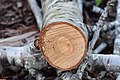
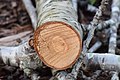
Prunus cerasus tree rings ROUND 1[edit]
These were all with my 85mm macro lens on "A" mode.


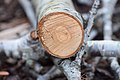
Prunus cerasus tree rings ROUND 2[edit]
These were all with my 85mm macro lens on either "A" mode or auto mode.
-

-

-
-

-
-

-
 auto
auto -
 auto
auto -
 auto
auto


Studies with exposure delay[edit]
These were all with my 85mm macro lens on either "A" mode or auto mode.
-

-

-

-

-

-
 auto
auto -

-


Studies with exposure delay ROUND 2[edit]
These were all with my 85mm macro lens on "A" mode.


Studies with exposure delay and single point focus - tree rings from main trunk[edit]
These were all with my 18-55mm lens on "A" mode.


Tree bark and focus stacking practice[edit]


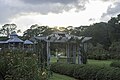
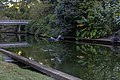
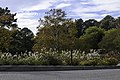
Red Wing Park including its Miyazaki Japanese Garden[edit]
These were all with my 18-55mm lens, mostly on "A" mode, mm setting varied.


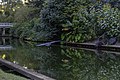
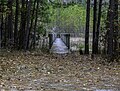
Red Wing Park Japanese Moon Bridge and Waterfall[edit]
These were taken with either my 18-55mm lens or 70-300mm lens on either "A" or "P" mode.


Red Wing Park Japanese Waterfall RAW[edit]
These were taken with either my 18-55mm lens or 70-300mm lens on either "A", "P", or auto mode.


Red Wing Park Japanese Moon Bridge and Waterfall RAW 2[edit]
These were taken with either my 18-55mm lens or 70-300mm lens on "M" mode.


Views of bridge showing correct perspective[edit]


Lens distortion notes[edit]
- Lens distortion due to imperfect design. If you imagine shooting a grid of squares, this would cause an effect like a barrel at the edges, or sometimes a pincushion (curved inwards) and sometimes mustache shaped waves. The first two are generally easy to correct simply by checking the "use lens profile" and making sure Lightroom has a profile for your lens. Some odd shaped distortions can't be corrected perfectly, and some lenses like fisheye are often best left uncorrected. I have "use lens profile" and "remove chromatic aberation" checked as part of my lens import defaults. If you ever take a photo and wish you had just a few more pixels round the edges, try unchecking the lens profile box, as you nearly always lose a little round the edges as part of the corrections.
- Vertical perspective distortion due to not holding the camera perfectly level. This causes a trapezium effect on the grid of squares. For most scenes, the solution is better camera technique (and making use of the camera's built in level if it has one). But often urban scenes will need a very slight adjustment in Lightroom. In the past, we had to do this manually: fix any rotation in the image first by getting central lines to be vertical (or the horizon level if you have a horizon). Then fix the vertical perspective slider to get outside lines to be vertical. Now Lightroom has some automatic buttons but I don't find they always do a very precise job. I find the Guided option in Lightroom is the best, provided you have some true verticals to use. If you are photographing a tall building, and want the verticals vertical, then you need to get back as far as you can. Trying to fix the verticals afterwards, if you are relatively close to the building, just ends up with strange stretched effects where the building can look top-heavy.
- Horizontal perspective problems. This is usually encountered when you are photographing a scene with lots of horizontal lines that are meant to be perpendicular to the viewer. Windows and gutters on a building, or steps or floor tiles in an interior. If you haven't held the camera perfectly straight wrt left/right then they end up angled in the photo and no amount of rotation will fix it. The horizontal slider can fix modest issues but can't work wonders. Also if you are in a symmetrical interior (like a church) then it is usually vital to ensure you stand absolutely in the centre -- that kind of mistake can't be fixed at all.
- Wide angle perspective distortion. This is when you use an ultra wide angle lens (or create a stitched image with a wide or tall angle of view). See File:St Pancras Railway Station 2012-06-23.jpg for an example. The distance perspective effect is stronger than human vision normally sees. Some scenes will not show the effect much at all, where as others that include people or architecture or round objects, will display the distortion strongly. I don't think any of your lenses will produce that -- you really need a lens that goes below 16mm on APS-C to see this. However, there's another time when this effect occurs, which is when you are very close to a subject, and is particularly noticeable in portraits. Too close and it it is unflattering to make the face more 3D. For an head/shoulders portrait then perhaps around 50 or 60mm on APS-C is best and for a closely framed head portrait then perhaps 85mm on APS-C.
Processing and color notes[edit]
The original suffered from poor lighting. That's not easily fixable for colour images as the results tend to look artificial. The sky is starting to show some colour posterisation in the grey clouds from being pushed. The brickwork and leaves are too contrasty. I see some odd adjustments in the EXIF. For example, this is an ISO 100 image, so I wouldn't expect much if any NR yet we have strong luminance and colour NR. With a Sony sensor there's usually very little reason to touch the colour NR slider unless one has extreme ISO values. Some colour saturation/hue adjustments seem quite extreme too. Best to keep those adjustments modest -- were you trying to make an overcast sky blue?
Studies with shifting single point focus[edit]
These were all with my 18-55mm lens, set at 55mm, "A" mode.
_young_fruits_1.jpg)
_young_fruits_2.jpg)
_young_fruits_3.jpg)
_young_fruits_4.jpg)
_young_fruits_5.jpg)


Boats RAW[edit]
These were taken with either my 18-55mm lens or 70-300mm lens on either "A", "P", or auto mode.


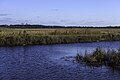
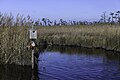
Back Bay NWR and Little Island Park RAW[edit]


Lotus Garden Park and Little Island Park next day RAW[edit]


Big Chair at Little Island Park RAW[edit]

Nelumo lutea studies RAW[edit]

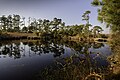
Oceana Pond late morning RAW[edit]


Oceana Pond 2 late afternoon RAW[edit]


Oceana Pond 3 early morning various settings and lenses RAW[edit]
-
-

-

-

-

-

-

-
-
 Six days later
 -
 Six days later


Psidium guajava "Ruby Supreme" RAW (except for first one)[edit]


Norfolk Tides vs Durham Bulls 01 July 2017[edit]


Norfolk Botanical Garden RAW[edit]


- The tone curve here is "Medium Contrast". For most of my images I use Linear and adjust the contrast using the other controls. Sometimes Medium Contrast is worth a try. I wouldn't use it as standard. Be aware though that if you do use it, the scene already starts off with contrast so the Clarity is just adding more.
- Set the exposure so that the midtones look right. Adjust the global contrast if required (I rarely reduce it unless an HDR scene and am unlikely to increase it beyond +25, and often untouched). In this image you have't altered either, which might be fine if the original shot was exposed correctly.
- Adjust the highlights and shadows somewhat if required to bring in highlight and shadow detail. Rarely need to go above +/- 50 here other than for an extreme high dynamic scene or an HDR image. In my experience, these are the main controls for removing the warnings of blown hightlights or shadow crushed to black. In this scene, there shouldn't have been any of either to begin with. Then adjust the white and black if required to stretch the histogram towards but not reaching clipping/crushing -- though not all subjects benefit from this and a low key or high key image will naturally sit towards one end of the histogram or the other. Here I see Highlights -79, Shadows +19, Whites -100, Blacks -12. I'd say that the highlights and whites settings are very extreme.
- Some images benefit from some added Clarity, particularly if the local contrast is low due to atmospheric effects or the shortcomings of a telephoto lens. For a natural close image like this consider 0..25 perhaps. Sometimes it helps to come back to the image after a break and you reconsider it with fresh eyes. A Clarity setting of +69 is radioactive. For black&white photography, such extreme local contrast can have an artistic effect, but for colour and for natural scenes or for recording artwork, that's far too high.
- The sharpening settings are complex and Lightroom does come with two useful presents for Landscape and Portraits, which are worth a try. Getting this right needs a book chapter but I think masking of +93 seems odd as that is practically turning sharpening off.
- Your image is only ISO 200 so will barely need any NR. If you are careful to not oversharpen and don't have to lift shadows much, it might not need any at all. The level here is 40 which is the sort of desperate "turn it to waxy plastic" setting one might use on an ISO 3200 image. If you do feel it necessary, try 10 and rarely will you need to go above 25. You shouldn't have to touch the colour NR at all, unless dealing with super high ISO.
- Avoid the colour controls alone for now. I see "Blue Saturation +12". On nearly all my colour photos, these are not necessary to adjust. Certainly with natural outdoor light there is little excuse to alter. Your camera should do a reasonable job with the white temperature/tint, and Lightroom has its own "auto" setting which sometimes is worth considering, but this is the main white balance is the main control you may need to tweak a little at times.
- The camera profile here is "Camera Landscape". This is Adobe's attempt at emulating your Nikon's "Landscape" profile. You will find that choosing one of these profiles makes quite drastic changes to the colours and tone and certainly shouldn't be the last setting you alter. FWIW, I have mine on "Camera Standard" and don't change it. This is Adobe's emulation of my Sony's standard profile, and I find it a little more interesting than "Adobe Standard" which is their extremely neutral profile. I can't really think that "Landscape" is appropriate for flowers, but don't know what Nikon's profile does. I suggest you stick with either of the two standard profiles you like best and leave that alone. Avoid "Vivid" unless you join 500px.
- Avoid applying circular gradient filters or vignettes unless trying to solve a problem or are going for a very arty photo. For most "documentary photography" like this flower, they aren't helpful or required.
- Of course, everyone does it differently and there is always more than one way and matters of taste. I recommend Jeff Schewe's The Digital Negative book.
I spotted now you have "sharpness 73" which may be why you then felt the need to have such a large mask or apply so much NR. Perhaps less sharpening to begin with would have helped but now with less NR I can see the leaf veins/hairs. I think probably the midtones are a little high which is best adjusted down just a little with the exposure slider. Really the combination of exposure/highlights/shadows should remove the majority of clipping/crushing warnings. With a lower exposure you will find you need less highlight reduction and certainly I think a -50 for whites is quite unusually high. I see you still have a little +5 saturation on Blue and actually the blue channel on the JPG is clipping.
Norfolk Botanical Garden 2 RAW[edit]


Norfolk Botanical Garden 3 RAW[edit]
-

-
-

-

-

-

-
-

-

-
-

-

-

-

-
 next day


Norfolk Botanical Garden 4 RAW[edit]
-
 f11
f11 -
 f13
f13 -

-

-
 f5.6 ISO250
 -
 f8 ISO250
 -
 f10 ISO250
 -
 f11 ISO320
 -
-

-
-

-
 next day


Norfolk Botanical Garden 5 RAW[edit]


Norfolk Botanical Garden 6 RAW[edit]


Norfolk Botanical Garden 7 RAW[edit]
-

-

-

-

-
 crop
crop -
-


Norfolk Botanical Garden 8 RAW[edit]


Norfolk Botanical Garden 9 RAW[edit]


Norfolk Botanical Garden 10 RAW[edit]


Norfolk Botanical Garden 11 RAW[edit]


Norfolk Botanical Garden 12 RAW[edit]
-
 no crop
 -
 crop
crop -

-

-


Norfolk Botanical Garden 13 RAW[edit]


Great Neck Park RAW[edit]


Hylotelephium spectabile flower[edit]


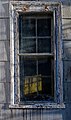
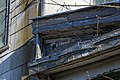
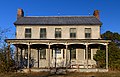
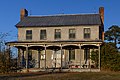
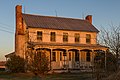
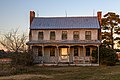
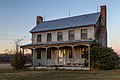
Historic Buildings[edit]
-
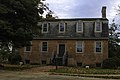
 Adam Thoroughgood House
 -
 Adam Thoroughgood House
 -
 Adam Thoroughgood House
 -
 Adam Thoroughgood House
 -
 Old Donation Episcopal Church
 -
 Old Donation Episcopal Church


Autumn Time[edit]


From here and below taken with a Nikon D850[edit]
-

-
 High ISO experiment
 -
 High ISO experiment
 -

-

-

-

-

-
-
-

-

-

-

-

-
-
-
-
-

-

-
-

-

-
-
-

-

-

-

-

-
-

-

-

-

-

-

-

-

-

-

-

-

-

-

-
-

-

-

-

-

-
-
-
-

-
-

-

-

-

-
-
-

-
-

-

-

-

-

-
-

-

-

-
-

-
-

-

-

-

-

-

-

-

-

-
-

-

-

-

-

-

-

-

-

-

-

-

-

-

-

-

-

-

-
-

-

-

-
-
-

-
-

-

-

-

-

-

-
-

-
-
-

-

-

-

-

-

-

-

-

-
-

-

-

-

-

-
-

-

-

-
-

-

-
-
-

-

-
-

-

-

-

-

-

-

-

-

-
-

-
-

-
-

-

-

-

-

-

-

-

-

-

-

-

-

-

-
-
-

-

-


