Category:Views from buses in Southern District
Jump to navigation
Jump to search
Media in category "Views from buses in Southern District"
The following 53 files are in this category, out of 53 total.
-
 Approach to toll plaza at south portal of Aberdeen tunnel, Hong Kong.jpg 3,672 × 2,616; 4.93 MB
-
 Deepwater Bay, Hong Kong, from west.jpg 4,288 × 3,216; 6.03 MB
-
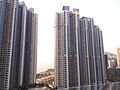
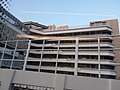
 HK NWFBus 30x view CyberPort to Central January 2019 SSG 01 residential buildings.jpg 3,264 × 2,448; 2.72 MB
-
 HK NWFBus 30x view CyberPort to Central January 2019 SSG 02 residential buildings.jpg 3,264 × 2,448; 2.4 MB
-

-

-
 HK NWFBus 30x view CyberPort to Pokfulam Road January 2019 SSG 03.jpg 3,264 × 2,448; 2.72 MB
-

-
-
 HK NWFBus 30x view CyberPort to Pokfulam Road January 2019 SSG 08.jpg 3,264 × 2,448; 1.99 MB
-
 HK NWFBus 30x view CyberPort to Pokfulam Road January 2019 SSG 09.jpg 3,264 × 2,448; 1.99 MB
-
 HK NWFBus 30x view CyberPort to Pokfulam Road January 2019 SSG 10.jpg 3,264 × 2,448; 3.05 MB
-
 HK NWFBus 30x view CyberPort to Pokfulam Road January 2019 SSG 11.jpg 3,264 × 2,448; 2.22 MB
-
 HK NWFBus 30x view CyberPort to Pokfulam Road January 2019 SSG 12.jpg 3,264 × 2,448; 2.09 MB
-
 HK NWFBus 30x view CyberPort to Pokfulam Road January 2019 SSG 13.jpg 3,264 × 2,448; 2.2 MB
-
 HK NWFBus 30x view CyberPort to Pokfulam Road January 2019 SSG 14.jpg 3,264 × 2,448; 2 MB
-
 HK NWFBus 30x view CyberPort to Pokfulam Road January 2019 SSG 15.jpg 3,264 × 2,448; 2.19 MB
-
 HK NWFBus 30x view CyberPort to Pokfulam Road January 2019 SSG 16.jpg 3,264 × 2,448; 2.28 MB
-
 HK NWFBus 30x view CyberPort to Pokfulam Road January 2019 SSG 17.jpg 3,264 × 2,448; 2.53 MB
-
 HK NWFBus 30x view CyberPort to Pokfulam Road January 2019 SSG 18.jpg 3,264 × 2,448; 2.54 MB
-
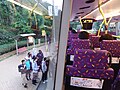
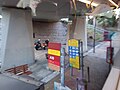 HK NWFBus 30x view CyberPort to Pokfulam Road January 2019 SSG 19 bus stop signs.jpg 3,264 × 2,448; 2.06 MB
-
 HK NWFBus 30x view CyberPort to Pokfulam Road January 2019 SSG 20.jpg 3,264 × 2,448; 2.19 MB
-
-
 HK NWFBus 30x view CyberPort to Pokfulam Road January 2019 SSG 22 Shine School VTC.jpg 3,264 × 2,448; 2.09 MB
-

-
 HK NWFBus 30x view CyberPort to Pokfulam Road January 2019 SSG 23 Shine VTC school.jpg 3,264 × 2,448; 1.89 MB
-

-
 HK NWFBus 30x view 數碼港巴士總站 CyberPort Bus Terminus January 2019 SSG.jpg 3,264 × 2,448; 2.65 MB
-
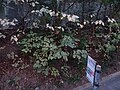
 HK 香港南區 Southern District 薄扶林道 Pokfulam Road December 2022 Px3 01 mountain.jpg 3,264 × 2,448; 3.55 MB
-

-
 HK 香港南區 Southern District 薄扶林道 Pokfulam Road December 2022 Px3 05.jpg 4,000 × 3,000; 5.15 MB
-
 HK 香港南區 Southern District 薄扶林道 Pokfulam Road December 2022 Px3 06.jpg 4,000 × 3,000; 4.8 MB
-
 HK 香港南區 Southern District 薄扶林道 Pokfulam Road December 2022 Px3 07.jpg 4,000 × 3,000; 5.83 MB
-

-

-
 HK 香港南區 Southern District 鋼綫灣 Telegraph Bay 數碼港 Cyberport December 2022 Px3 01.jpg 4,000 × 3,000; 4.13 MB
-
 HK 香港南區 Southern District 鋼綫灣 Telegraph Bay 數碼港 Cyberport December 2022 Px3 02.jpg 4,000 × 3,000; 5.3 MB
-
 HK 香港南區 Southern District 鋼綫灣 Telegraph Bay 數碼港 Cyberport December 2022 Px3 03.jpg 4,000 × 3,000; 4.79 MB
-
 HK 香港南區 Southern District 鋼綫灣 Telegraph Bay 數碼港 Cyberport December 2022 Px3 04.jpg 3,264 × 2,448; 4.07 MB
-
 HK 香港南區 Southern District 鋼綫灣 Telegraph Bay 數碼港 Cyberport December 2022 Px3 05.jpg 4,000 × 3,000; 5.52 MB
-
 HK 香港南區 Southern District 鋼綫灣 Telegraph Bay 數碼港 Cyberport December 2022 Px3 06.jpg 3,000 × 4,000; 5.69 MB
-
 HK 香港南區 Southern District 鋼綫灣 Telegraph Bay 數碼港 Cyberport December 2022 Px3 07.jpg 3,000 × 4,000; 5.83 MB
-
 HK 香港南區 Southern District 鋼綫灣 Telegraph Bay 數碼港 Cyberport December 2022 Px3 08.jpg 4,000 × 3,000; 6.74 MB
-
 HK 香港南區 Southern District 鋼綫灣 Telegraph Bay 數碼港 Cyberport December 2022 Px3 09.jpg 4,000 × 3,000; 6.63 MB
-

-
 HK 香港南區 Southern District 鋼綫灣 Telegraph Bay 數碼港 Cyberport December 2022 Px3 mall.jpg 4,000 × 3,000; 5.5 MB
-
 On-ramp to Route 1 south of Aberdeen Tunnel, Ocean Park, Hong Kong.jpg 4,000 × 3,016; 5.65 MB
-
 Repulse Bay, Hong Kong, from east.jpg 4,288 × 2,320; 5 MB
-
 Repulse Bay, Hong Kong, from west.jpg 4,136 × 2,932; 5.46 MB
-
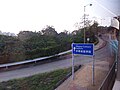
 Road signage at junction of Island Road and Route 1 near Ocean Park, Hong Kong.jpg 4,288 × 2,928; 5.94 MB
-
 South portal, Aberdeen Tunnel, Hong Kong.jpg 3,656 × 2,936; 6.08 MB
-
 Stanley and Stanley Bay, Hong Kong.jpg 4,288 × 2,292; 5.62 MB
-
 Toll booth at south portal of Aberdeen Tunnel, Hong Kong.jpg 3,792 × 2,964; 1.46 MB


