Category:Photographs by Jack Pfaller
Jump to navigation
Jump to search
Jack Pfaller, a NASA Kennedy photographer
Media in category "Photographs by Jack Pfaller"
The following 200 files are in this category, out of 263 total.
(previous page) (next page)-
 ACES STS-132 practice emergency exit procedures.jpg 1,580 × 2,260; 795 KB
-
 Adult Osprey Guards Its Young At NASA's KSC.jpg 2,000 × 3,000; 710 KB
-
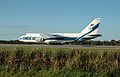 An-124 lands in KSC.jpg 3,000 × 1,917; 642 KB
-
 Antonov An-124 arrives at KSC with MRM1.jpg 3,000 × 2,000; 3.95 MB
-
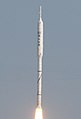
 Ares I-X launch 04.jpg 2,000 × 3,000; 3.24 MB
-
 Ares I-X rollout 04.jpg 2,000 × 3,000; 4.12 MB
-
 Ares I-X rollout.jpg 3,000 × 2,000; 518 KB
-
 Ares-I-X 2009-5937.jpg 2,000 × 3,000; 3.36 MB
-
 Ares-I-X 2009-5938 (cropped).jpg 583 × 860; 272 KB
-
 Ares-I-X 2009-5938.jpg 2,000 × 3,000; 2.89 MB
-
 Assembling of an Delta II 7925 in the Mobile service tower.jpg 2,000 × 3,008; 778 KB
-
 Atlantis Ready to Fly.jpg 3,000 × 2,060; 592 KB
-
 Atlantis' Final Rollover.jpg 2,128 × 1,596; 2.08 MB
-
 Atlas V (401), No. AV-021, with SDO on board before arriving at Launch Pad 41.jpg 2,000 × 3,000; 1.72 MB
-
 Back to the Beginning DVIDS723911.jpg 3,000 × 2,032; 405 KB
-
 Bald Eagle Merritt Island National Wildlife Refuge.jpg 1,806 × 1,355; 148 KB
-
 Begin of the employment of one of Juno's solar panels.jpg 2,000 × 3,000; 4.28 MB
-
 Boeing 727 aircraft owned by Zero Gravity Corp. (NASA) (475109232).jpg 3,000 × 1,995; 602 KB
-
 Centaur upper stage lifted up to put on the first stage of the Atlas V.jpg 2,000 × 3,000; 3.76 MB
-
 Delta II with Kepler.jpg 2,008 × 3,000; 1.53 MB
-
 Delta IV Launch.jpg 2,640 × 1,980; 550 KB
-
 Deployment of one of Junos solar pannels nearly complete.jpg 3,000 × 2,000; 4.11 MB
-
 Detail of one of Junos solar pannels.jpg 3,000 × 2,000; 3.19 MB
-
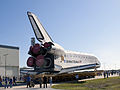
 Discovery at Launch Pad (STS0133).jpg 3,000 × 2,069; 4.5 MB
-
 Discovery Gets a Tow DVIDS723474.jpg 3,000 × 2,000; 423 KB
-
 Discovery High Bay 3 Vehicle Assembly Building STS-133.jpg 3,000 × 2,000; 527 KB
-
 DiscoveryOPFtoVAB.jpg 3,008 × 2,000; 560 KB
-
 Endeavour payload bay.jpg 2,000 × 3,000; 4.6 MB
-
 Endeavour STS-134 at Launch Pad 39A.jpg 2,000 × 3,000; 4.47 MB
-
 Et-new-look.jpg 3,008 × 2,000; 2.05 MB
-
 Ferry Flight Lands at Kennedy DVIDS723109.jpg 3,000 × 2,000; 233 KB
-
 Freedom Star and Pegasus deliver External Tank for STS-134.jpg 3,000 × 2,000; 741 KB
-
 Go Atlantis.jpg 3,000 × 2,008; 449 KB
-
 GOES-N is encapsulated.jpg 2,000 × 3,008; 523 KB
-
 GOES-O aboard Delta IV on launch pad.jpg 3,000 × 2,000; 4.41 MB
-
 Gulfstream II - Shuttle Training Aircraft N945NA cockpit.jpg 3,000 × 2,000; 1.38 MB
-
 Gulfstream II - Shuttle Training Aircraft N945NA.jpg 2,818 × 1,470; 1.5 MB
-
 High-gain antenna before attaching to Juno.jpg 2,000 × 3,000; 4 MB
-
 High-gain antenna installation on Juno.jpg 2,000 × 3,000; 4.5 MB
-
 High-gain antenna installation.jpg 3,000 × 2,000; 3.98 MB
-
 Illumination test of Junos pardly shaddowed solar pannels with the magnetometer.jpg 3,000 × 2,000; 4.36 MB
-
 Illumination test of the solar panel with magnetometer.jpg 3,000 × 2,000; 4.01 MB
-
 Illumination test on Juno's solar panel with the magnetometer.jpg 3,000 × 2,000; 4.31 MB
-
 Illumination test on one of Juno's solar panels.jpg 3,000 × 2,000; 4.81 MB
-
 Illumination test with partly shadowed solar panels.jpg 3,000 × 2,000; 4.54 MB
-
 Illumination tests on Juno's solar panel with the magnetometer boom.jpg 3,000 × 2,000; 4.19 MB
-
 Installation of bolt cutters to a THEMIS spacecraft.jpg 3,008 × 2,000; 387 KB
-
 Installation of termal isulaton at Junos magnetometer boom.jpg 2,000 × 3,000; 4.86 MB
-
 Juno in its container in the McDonnell Douglas C-17.jpg 3,000 × 2,000; 3.95 MB
-
 Juno on the rotation stand.jpg 2,000 × 3,000; 4.2 MB
-
 Juno unloading from a McDonnell Douglas C-17.jpg 3,000 × 2,000; 4.02 MB
-
 Juno's high-gain antenna is installed.jpg 3,000 × 2,000; 4.29 MB
-
 Juno's high-gain antenna just before installation.jpg 3,000 × 2,000; 4.26 MB
-
 Juno's solar panel 1 is partly shadowed at the illumination test.jpg 3,000 × 2,000; 4.38 MB
-
 Junos Container removed.jpg 3,000 × 2,000; 4.3 MB
-
 Kepler satellite mating in mobile service tower.jpg 2,008 × 3,000; 3.1 MB
-
 Kepler space telescope on its Delta II third stage.jpg 2,008 × 3,000; 3.46 MB
-
 Kibo EF move to payload cannister.jpg 3,000 × 2,008; 3.16 MB
-
 Kibo Exposed Section in Kennedy's SSPF in 2009 (KSC-2009-2635).jpg 3,000 × 2,008; 910 KB
-
 Kibo Exposed Section in Kennedy's SSPF in 2009 (KSC-2009-2636).jpg 3,000 × 2,008; 888 KB
-
 KSC-2009-2329 orig.jpg 3,000 × 2,008; 928 KB
-
 KSC-2009-2332 orig.jpg 2,008 × 3,000; 1.02 MB
-
 KSC-2009-2333 orig.jpg 3,000 × 2,029; 1.04 MB
-
 KSC-2009-2336 orig.jpg 2,008 × 3,000; 958 KB
-
 Last external fuel tank ET-122 commemorative patch.jpg 1,192 × 1,408; 1.45 MB
-
 Launch Control Center with new windows.jpg 3,000 × 2,000; 3.3 MB
-
 LCROSS LRO being prepared for fairing installation.jpg 720 × 482; 345 KB
-
 Liberty Star with SRB after STS-119.jpg 3,000 × 2,008; 2.64 MB
-
 McDonnell Douglas C-17 before unloading Juno.jpg 3,000 × 2,000; 4.11 MB
-
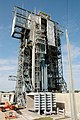
 Mobile Launcher assembly 02.jpg 3,000 × 2,008; 2.96 MB
-
 Mobile Launcher assembly 07.jpg 3,000 × 2,000; 3.72 MB
-
 Mobile Launcher assembly 09.jpg 3,000 × 2,000; 3.53 MB
-
 Mobile Launcher assembly 10.jpg 3,000 × 2,000; 4.32 MB
-
 Mobile Launcher assembly 11.jpg 2,000 × 3,000; 3.35 MB
-
 Mobile Launcher assembly 14.jpg 3,000 × 2,000; 2.18 MB
-
 Mobile Launcher assembly 15.jpg 2,000 × 3,000; 1.74 MB
-
 Mobile Launcher assembly 16.jpg 3,000 × 2,000; 1.6 MB
-
 Mobile Launcher assembly 18.jpg 2,000 × 3,000; 4.19 MB
-
 Mobile Launcher assembly 20.jpg 2,000 × 3,000; 3.13 MB
-
 MRM-1 at KSC.jpg 1,999 × 1,333; 642 KB
-
 NASA Convoy Command vehicle.jpg 2,061 × 1,550; 1.73 MB
-
 NASA Railroad 1 cab closeup (KSC-08PD-0641).jpg 2,008 × 3,000; 660 KB
-
 NASA Railroad 1 moves SRB segment cars at KSC (KSC-08PD-0640).jpg 2,808 × 1,962; 1.69 MB
-
 NASA Railroad locomotive 1.jpg 3,000 × 2,008; 3.46 MB
-
 NASA T-38 carrying STS-133 crew.jpg 2,576 × 1,389; 1.3 MB
-
 NASA UH-1B Iroquois N416NA monitoring STS-133 crew.jpg 2,000 × 1,138; 733 KB
-
 NASA's Freedom Star pulls ET-122 for STS-134.jpg 2,407 × 1,523; 3.04 MB
-
 Nine Merlin 1C engines of a Falcon 9.jpg 2,000 × 3,000; 966 KB
-
 One of five THEMIS satellites undergoes a solar array test.jpg 3,008 × 2,000; 526 KB
-
 One of Juno's solar panels before illumination test.jpg 3,000 × 2,000; 4.62 MB
-
 One of Juno's solar panels.jpg 3,000 × 2,000; 3.86 MB
-
 Orbiter Processing Facility-Atlantis payload bay for STS-117.jpg 3,008 × 2,000; 793 KB
-
 Packing COLBERT.jpg 3,000 × 2,008; 2.58 MB
-
 Part of one of Junos solar panel.jpg 3,000 × 2,000; 3 MB
-
 Platforms surround the Ares I-X.jpg 2,000 × 3,000; 728 KB
-
 Power Video Grapple Fixture.jpg 278 × 280; 89 KB
-
 Preparation for Delta 319 launch (KSC-06PD-1001).jpg 1,809 × 3,000; 945 KB
-
 Preparation for Delta 319 launch (KSC-06PD-1004).jpg 2,000 × 3,008; 1,018 KB
-
 Preparation of Juno for rotation test stand.jpg 3,000 × 2,000; 4.92 MB
-
 Rassvet arrives at KSC 1.jpg 3,000 × 2,000; 3.75 MB
-
 Rassvet arrives at KSC 3.jpg 2,970 × 1,980; 3.63 MB
-
 Rassvet arrives at KSC 4.jpg 3,000 × 2,000; 4.42 MB
-
 Rassvet arrives at KSC 5.jpg 3,000 × 2,000; 3.58 MB
-
 Royal Canadian Air Force Snowbirds at Kennedy Space Center.jpg 1,836 × 1,380; 404 KB
-
 SDO before monomethylhydrazine propellant loading.jpg 3,000 × 2,000; 3.93 MB
-
 SDO in its Payload fairing is lifted onto its Atlas V (401).jpg 2,152 × 3,000; 3.62 MB
-
 SDO in the Payload fairing is lifted onto the Atlas V (401).jpg 3,000 × 2,000; 4.55 MB
-
 SDO's Atlas V (401) at first launch attempt.jpg 3,000 × 2,000; 3.81 MB
-
 SDO's Atmospheric Imaging Assembly.jpg 2,000 × 3,000; 846 KB
-
 SDOs Atlas V (401) has left the VIF on its way to Launch Pad 41.jpg 2,000 × 3,000; 1.47 MB
-
 SDOs Atlas V (401) is leaving the VIF.jpg 2,000 × 3,000; 1.8 MB
-
 SDOs Atlas V (401) on Launch Pad 41.jpg 2,091 × 3,000; 2.59 MB
-
 Solar Dynamics Observatory with extended solar arrays.jpg 2,358 × 3,000; 4.27 MB
-
 Solar panel illumination test.jpg 3,000 × 2,000; 4.67 MB
-
 Solar panel with magnetomerter at the end.jpg 3,000 × 2,000; 4.54 MB
-
 Space Shuttle Atlantis on Launch Pad (27991868946).jpg 3,000 × 2,060; 3.19 MB
-
 Space Shuttle Atlantis on Launch Pad (28026561445).jpg 1,958 × 3,000; 3.24 MB
-
 Space Shuttle Atlantis on Launch Pad (28026561655).jpg 2,008 × 3,000; 2.89 MB
-
 Space Shuttle Atlantis, ET and SRB seen from backside on LC 39B.jpg 3,008 × 2,000; 474 KB
-
 Space Shuttle Discovery makes its final landing at the conclusion of STS-133.jpg 3,000 × 2,000; 4.79 MB
-
 Space Shuttle main engine visual inspection.jpg 3,000 × 2,000; 4.53 MB
-

-
 SRBs are clustered around the Delta II base.jpg 2,000 × 3,008; 536 KB
-
 Stowing one of Juno's solar panels.jpg 2,000 × 3,000; 4.03 MB
-
 STS-117-Atlantis-0645.jpg 2,000 × 3,008; 682 KB
-
 Sts-121 leonardo prepare.jpg 3,008 × 2,000; 562 KB
-
 STS-122 Landing.jpg 3,000 × 2,008; 532 KB
-
 STS-122 landing.jpg 3,000 × 2,008; 565 KB
-
 STS-123 - Thunderbirds.jpg 3,000 × 2,091; 291 KB
-
 STS-125 and STS-400 on Launch Pads.jpg 3,000 × 2,000; 3.42 MB
-
 STS-125 external tank arrival at VAB.jpg 3,000 × 2,008; 584 KB
-
 STS-126 MPLM Leonardo and LMC.jpg 2,040 × 1,360; 1.15 MB
-
 STS-127-2009-3836.jpg 3,000 × 2,000; 4.08 MB
-
 STS-128 Return to KSC 12.jpg 3,000 × 2,000; 3.75 MB
-
 STS-128 Return to KSC 15.jpg 3,000 × 2,000; 3.74 MB
-
 STS-128 Return to KSC 16.jpg 3,000 × 2,000; 3.06 MB
-
 STS-129 Atlantis Ready to Roll.jpg 3,000 × 2,000; 647 KB
-
 STS-129 ExPRESS Logistics Carrier 11.jpg 3,000 × 2,000; 4.25 MB
-
 STS-129 ExPRESS Logistics Carrier 12.jpg 3,000 × 2,000; 3.56 MB
-
 STS-129 ExPRESS Logistics Carrier 13.jpg 2,000 × 3,000; 3.8 MB
-
 STS-129 ExPRESS Logistics Carrier 14.jpg 3,000 × 2,000; 4.19 MB
-
 STS-129 ExPRESS Logistics Carrier 15.jpg 2,000 × 3,000; 3.49 MB
-
 STS-129 Landing 07.jpg 3,000 × 2,000; 4.13 MB
-
 STS-129 Landing 11.jpg 3,000 × 2,000; 3.3 MB
-
 STS-129 Orbiter Atlantis Mate to Stack 1.jpg 3,000 × 2,000; 4.31 MB
-
 STS-129 Orbiter Atlantis Mate to Stack 2.jpg 3,000 × 2,000; 4.24 MB
-
 STS-129 Orbiter Atlantis Mate to Stack.jpg 2,000 × 3,000; 735 KB
-
 STS-129 Orbiter Atlantis Rollover 1.jpg 2,000 × 3,000; 2.88 MB
-
 STS-129 Orbiter Atlantis Rollover 2.jpg 3,000 × 2,095; 3.66 MB
-
 STS-129 Orbiter Atlantis Rollover 3.jpg 3,000 × 2,009; 3.32 MB
-
 STS-129 Orbiter Atlantis Rollover 4.jpg 3,000 × 2,000; 3.83 MB
-
 STS-129 Orbiter Atlantis Sling 2.jpg 2,000 × 3,000; 4.17 MB
-
 STS-129 Orbiter Atlantis Sling 3.jpg 2,000 × 3,000; 4.28 MB
-
 STS-129 Payload Canister 3.jpg 3,000 × 2,000; 4.33 MB
-
 STS-130 Endeavour main engine no. 1 removal.jpg 3,000 × 2,000; 4.72 MB
-
 STS-130 Endeavour Mate to Stack.jpg 2,000 × 3,000; 4.88 MB
-
 STS-130 External Tank 1.jpg 3,000 × 2,000; 4.2 MB
-
 STS-130 External Tank 2.jpg 3,000 × 2,000; 3.86 MB
-
 STS-130 External Tank 3.jpg 2,000 × 3,000; 3.45 MB
-
 STS-130 External Tank 4.jpg 2,000 × 3,000; 4.38 MB
-
 STS-130 Payload Canister 2.jpg 3,000 × 2,057; 3.88 MB
-
 STS-130 Training Kathryn Hire becomes familiar with Tranquility.jpg 2,000 × 3,000; 3.68 MB
-
 STS-130 Training Kathryn Hire takes a tour of the Tranquility module.jpg 2,000 × 3,000; 3.94 MB
-
 STS-131 Discovery in OPF-3.jpg 3,000 × 2,000; 4.87 MB
-
 STS-131 Discovery landing 3.jpg 3,000 × 2,000; 3.26 MB
-
 STS-131 Discovery landing 4.jpg 3,000 × 2,000; 3.4 MB
-
 STS-131 Discovery SSME Installation.jpg 3,000 × 2,000; 4.73 MB
-
 STS-131 External Tank.jpg 3,000 × 2,210; 3.89 MB
-
 STS-131 Leonardo payload canister.jpg 3,000 × 2,000; 1.68 MB
-
 STS-132 Atlantis insideVAB4.jpg 3,000 × 2,000; 3.8 MB
-
 STS-132 Atlantis putty repair HRSI.jpg 2,000 × 3,000; 5.08 MB
-
 STS-132 Preparing to Enter.jpg 2,000 × 3,000; 565 KB
-
 STS-133 access door closed.jpg 2,000 × 3,000; 4.46 MB
-
 STS-133 access door opened.jpg 2,000 × 3,000; 4.76 MB
-
 STS-133 Discovery Launch Pad 39A.jpg 3,000 × 2,000; 539 KB
-
 STS-133 Discovery outfitted with one SSME.jpg 3,000 × 2,000; 5.27 MB
-
 STS-133 Discovery second rollout 1.jpg 3,000 × 2,000; 4.6 MB
-
 STS-133 Discovery second rollout 6.jpg 3,000 × 2,000; 723 KB
-
 STS-133 ELC-4 Deck-to-keel mate.jpg 3,000 × 2,000; 1.5 MB
-
 STS-133 ends as Space Shuttle Discovery makes it final landing.jpg 3,000 × 2,000; 3.86 MB
-
 STS-133 ends as Space Shuttle Discovery touches down for the final time.jpg 3,000 × 2,000; 4.12 MB
-
 STS-133 External Tank.jpg 3,000 × 2,000; 670 KB
-
 STS-133 GUCP ground umbilical carrier plate removing.jpg 2,000 × 3,000; 4.36 MB
-
 STS-133 KSC-SR3 Launch L-2 Days to Launch Sign.jpg 4,752 × 3,168; 6.14 MB
-
 STS-133 Last towback of Space Shuttle Discovery.jpg 3,000 × 2,000; 3.69 MB
-
 STS-133 look inside the intertank.jpg 3,000 × 2,000; 3.37 MB
-
 STS-133 PMM Leonardo and ELC-4 in Discovery's payload bay.jpg 2,000 × 3,000; 4.15 MB
-
 STS-133 PMM Leonardo.jpg 3,000 × 2,000; 1.23 MB
-
 STS-133 repair work external tank - radius blocks.jpg 1,368 × 1,688; 1.61 MB
-
 STS-133 repair work external tank closeup.jpg 3,000 × 2,000; 6.34 MB
-
 STS-133 repair work external tank.jpg 3,000 × 2,000; 4.91 MB
-
 STS-133 SRBs and External Tank in the VAB.jpg 2,011 × 3,000; 4.32 MB
-
 STS-134 Alpha Magnetic Spectrometer in the Space Station Processing Facility.jpg 3,000 × 2,000; 4.45 MB
-
 STS-134 Alpha Magnetic Spectrometer launch preparations.jpg 1,452 × 1,878; 1.12 MB
-
 STS-134 Endeavour approaches the VAB.jpg 3,000 × 2,000; 618 KB
-
 STS-134 Endeavour last rollover commemorative photo.jpg 3,000 × 2,000; 693 KB
-
 STS-134 Endeavour Ready to Roll.jpg 3,000 × 2,000; 1.06 MB
-
 STS-134 Endeavour Rollout 4.jpg 2,000 × 3,000; 4.63 MB
-
 STS-134 Endeavour Rollout 5.jpg 3,000 × 2,000; 4.38 MB
-
 STS-134 Endeavour Rollout 6.jpg 3,000 × 2,000; 4.19 MB


.jpg)


,_No._AV-021,_with_SDO_on_board_before_arriving_at_Launch_Pad_41.jpg)


_(475109232).jpg)


.jpg)


.jpg)
.jpg)


.jpg)
.jpg)


.jpg)
.jpg)


.jpg)
.jpg)
_at_first_launch_attempt.jpg)

_has_left_the_VIF_on_its_way_to_Launch_Pad_41.jpg)
_is_leaving_the_VIF.jpg)
_on_Launch_Pad_41.jpg)


.jpg)
.jpg)
.jpg)


